
Yes, you read that right. Today, while the house is filled with the noise of Mr Nerd drilling away on our bathroom renovation, I am going to blog about our toilet. I aim to thrill. But seriously, I love how we improved the toilet and now I think it looks cute!
I know some of the more glamorous interior design bloggers don’t like to show toilets (or TVs) in their blog photos at all and like to pretend that toilets don’t exist. But guys, the truth is – I would actually say that toilets exist in many Australian houses these days. I know.
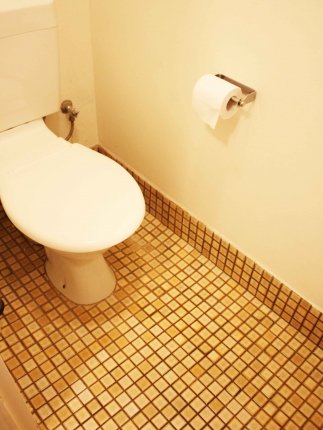
We have a 1970s house and, fairly typical of that time, some of the rooms don’t have much built-in storage. One of these rooms is our laundry with its adjoining toilet. It’s the ubiquitous 1970s Australian laundry; a big steel laundry tub, orange 70s tapware, no proper built-in storage, a squeaky aluminium fly wire door opening onto a side garden, a mass of fugly brown floor tiles that always look dirty, probably because they are.
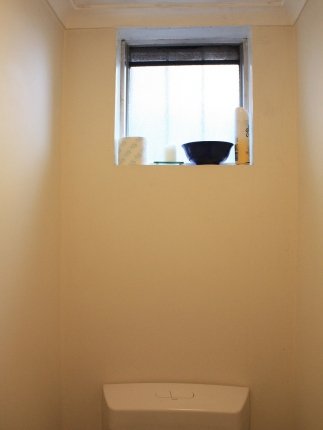
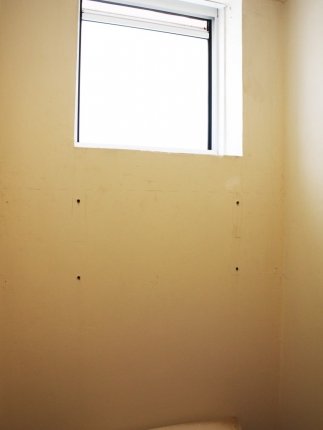
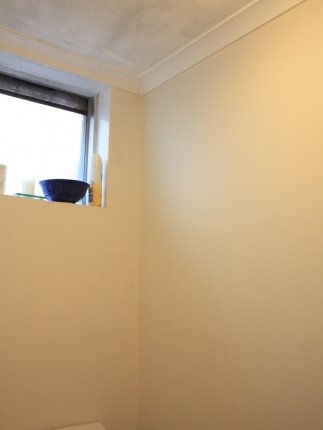
In the toilet itself, there was an old mission brown aluminium window that was just creepy. At one point, I realised that some wasps were actually sneaking into our house through the toilet window’s torn fly wire. Gross. So I duct-taped bits of cardboard over the window. Very crack den chic. (And people ask me why I keep calling my house The Crap Shack! This sort of thing is why).
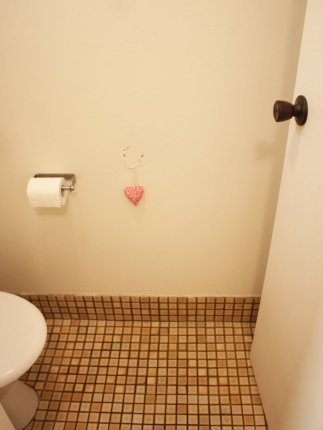
ABOVE: Our delightful laundry and toilet floor tiles. Note the pink heart? While we were gutting the bathroom on the other side of the wall, a stud in the wall actually punched clear through the wall to the other side, leaving a hole. I hung a heart on it and pushed it back into the wall to make it seem more deliberate.
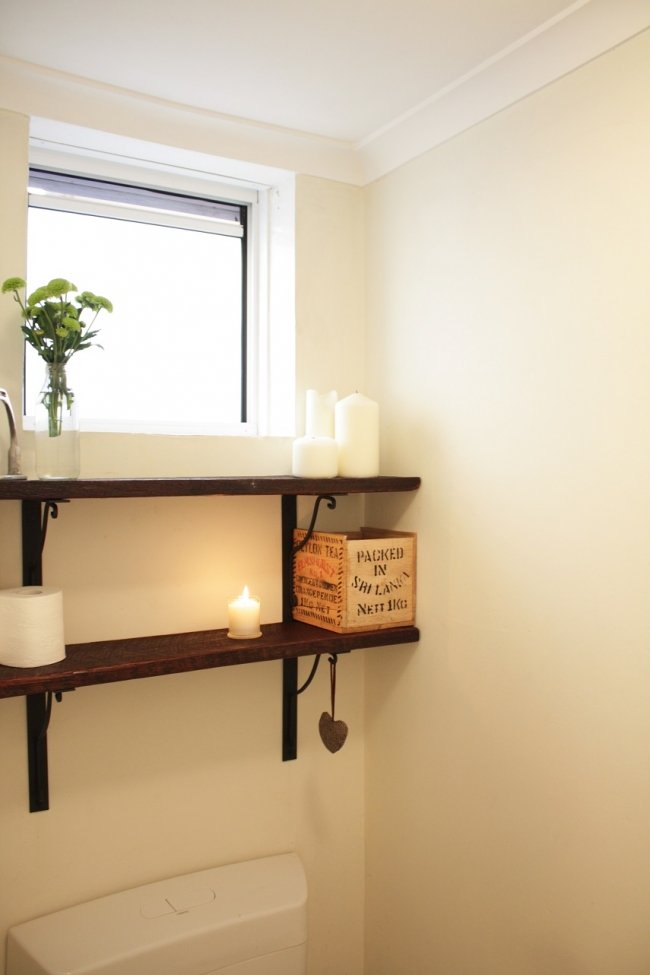
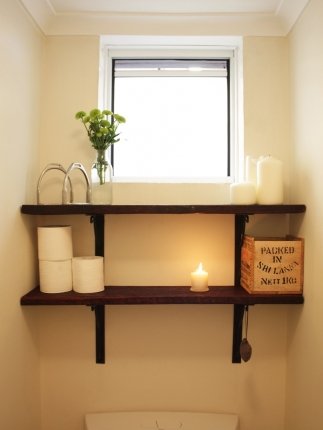
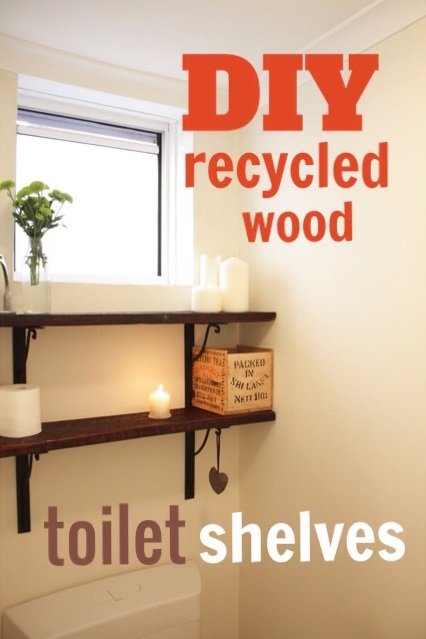
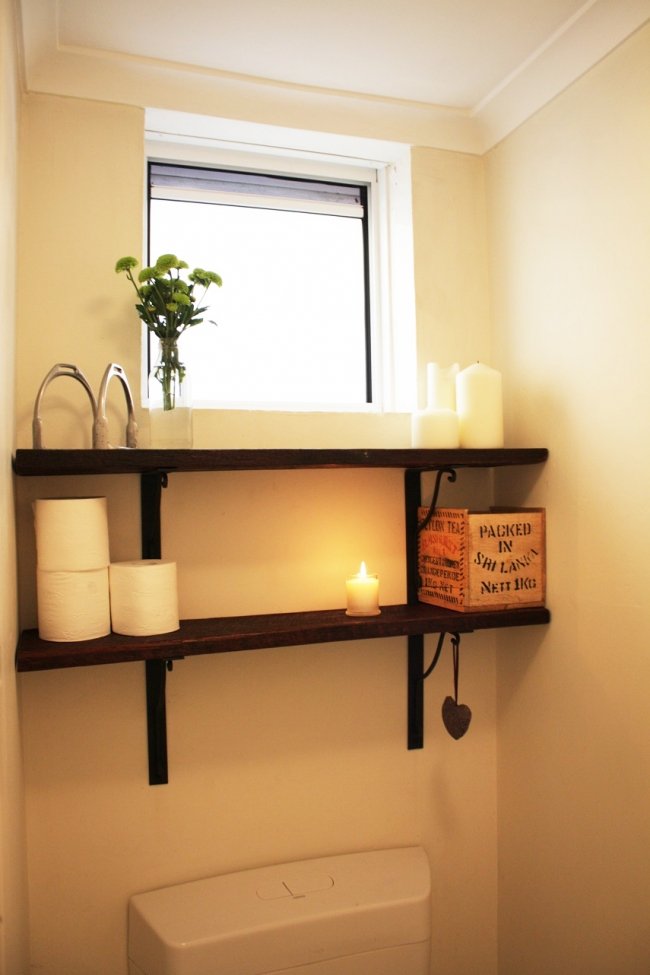
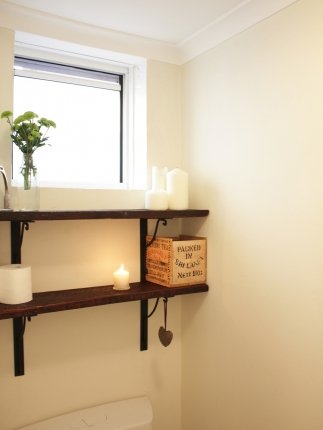
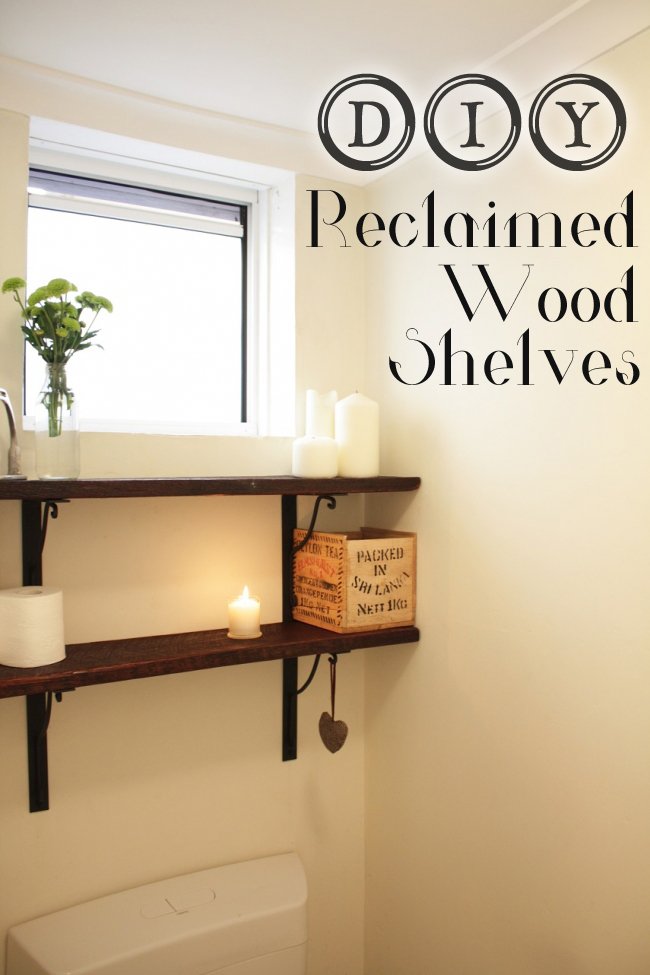
Anyway a couple of weeks ago we finally got the window replaced (you can read about how embarrassing that turned out to be here). Then I thought I should put in some shelves. I had been thinking that we should make the most of the ‘dead space’ above the toilet and use it for shelves. Because our old house feels kind of rustic and worn, and the walls are imperfect and a little wonky, I envisioned shelves made of old recycled wood. Something that would give us a proper place for storing toilet paper rolls, air freshener, candles etc.
Mr Nerd was away on a work trip and I thought I would do this project as a surprise for when he gets home. I know, what man doesn’t daydream about coming home from a work trip to find there are now shelves in the toilet. Mr Nerd is a lucky man.
Plus, I like to show him I am a capable woman, and skilled at doing DIY things without his assistance. I called one of my little sisters Simone over to help me because she is a very practical person. I knew we already had the perfect bit of wood for the shelves lying in the garage. It was solid, rustic, worn-looking, the perfect thickness. The only problem was, Mr Nerd uses it to wheel his race bike onto the back of the trailer, and I don’t think he would have been too impressed if he came home to find I had chopped it into pieces to make toilet shelves.
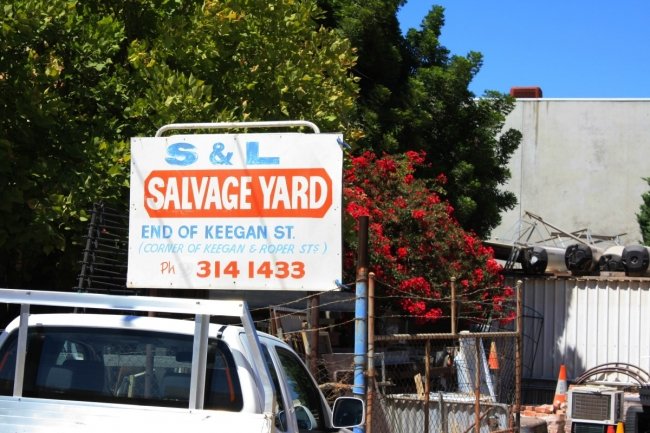
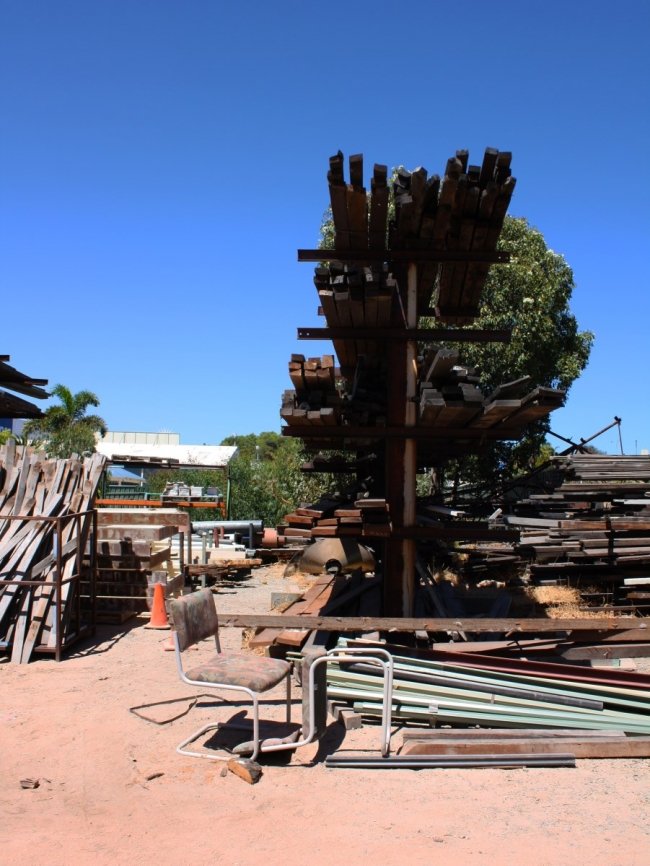
So Simone and I headed to a salvage yard - S&L Salvage Yard in O’Connor, because the man there is nice. “Hello ladies,” he said to us cheerfully. “What are you after?” I told him we wanted a crapped-out looking piece of wood to make shelves. “Ahhh, so you’re going for the, as they call it, the shabby chic look,” he said wisely. “This way.” We picked an old jarrah sleeper with nail marks in it ($15).
Then it was on. Mr Nerd was due back home in four hours. Simone and I were focused. We had our wood. We had a deadline. We had a mission. We may have seen the icecream man truck on the way home and taken a short detour. But then it was back on.

We worked frantically on the shelves, in scorching summer heat. It was kind of like being on one of those renovation reality TV shows that I didn’t get on (you can read more about that here if you haven’t yet).
2. Measure the width of your walls and mark off your lengths on your sleeper.
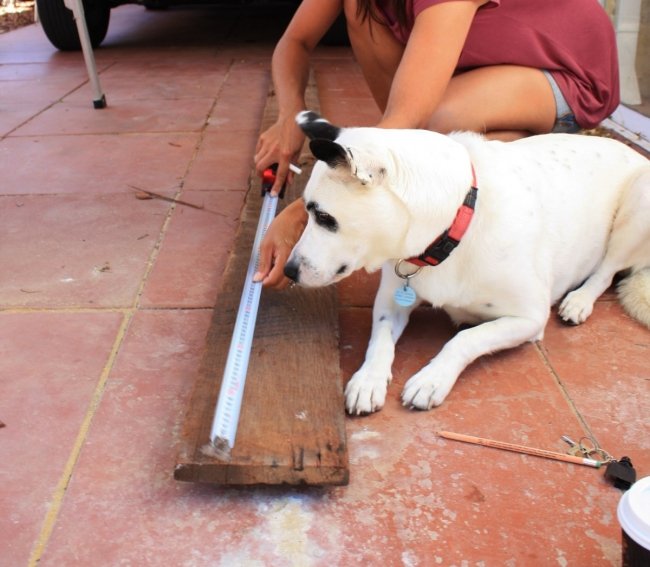
MEASURE RIGHT: Nala likes to use a Trojan measuring tape - they have a great product range.
3. Cut your pieces of wood.

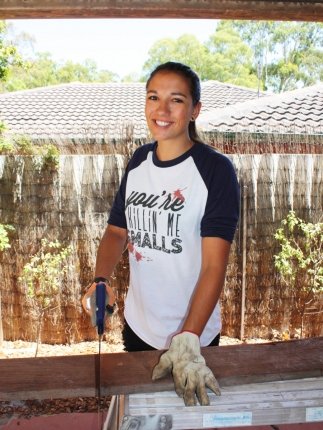
ABOVE: My clever sister designs a lot of her own T-shirts and sells them online here - it is the T-shirt shop for you if your idea of small screen heaven is Hocus Pocus, Never Been Kissed, Clueless, The Simpsons. And if you don't know where the hell You're Killin Me Smalls is from you need to watch The Sandlot Kids pronto.
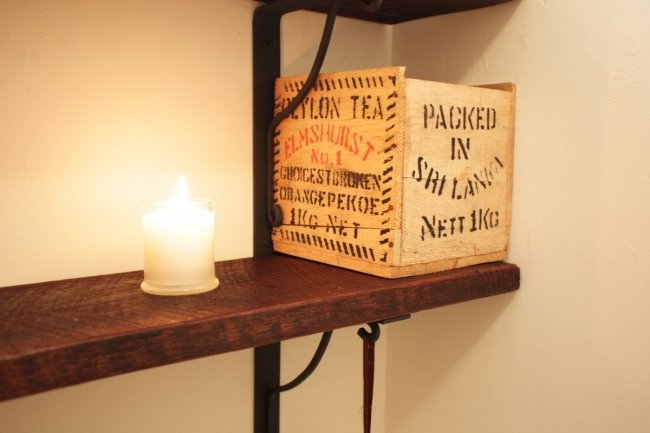
4. Sand your shelves. I actually didn’t want to sand mine too much because I wanted them to keep as much of their rustic look as possible. You can also mark your wood shelves with chalk, white paint or texta marks to give it more ‘character’.
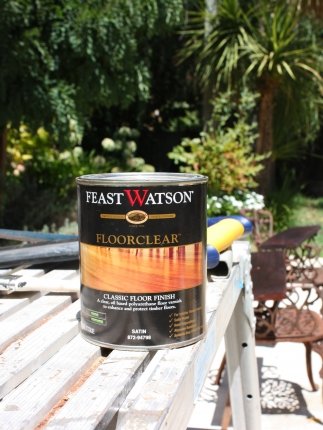
5. Seal or limewash your pieces of wood. I used Feast Watson Floorclear in Satin just because we had a tin in the shed left over from when I sanded back our kitchen benchtops.
6. While the sealer is drying, mark out the spots where you want the shelves to go and where the shelf brackets need to go. Don’t make your bottom shelf too low/close to the toilet, it will look like The Burrow in Harry Potter. Unless weird is your thing.
7. Use a leveler to make sure your brackets are level. We used IKEA Ekby Wall Brackets ($6 each). For a small space like a toilet I would advise going for brackets where you just pop the shelf on top of the bracket, rather than having to slot it into a bracket. The IKEA Ekby Stilig wall brackets are also nice.
8. Realise you have to use a regular drill because you can't find the hammer drill your husband has hidden from you. Never mind. Drill your holes into the wall.
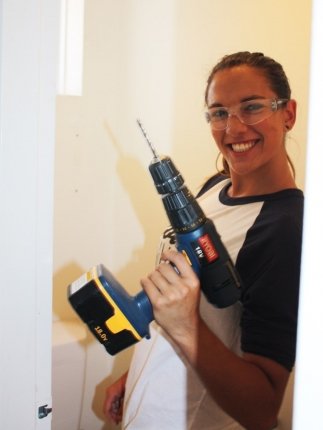
ABOVE: Discover that your husband has hidden the hammer drill from you and you can't reach him to beg him where it was.... brighten up when your sister says you can try to use a regular drill instead. Voila!
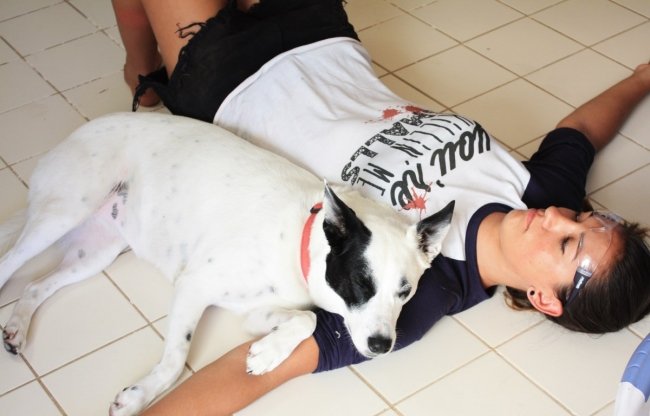
10. After half an hour of trying to drill holes in Kings-Landing-tough stone brick walls on a 40-degree summer day, pass out on the floor in exhaustion.
11. Try drilling again. Hammer in wall plugs.
12. Put up your wall brackets and screw them in.
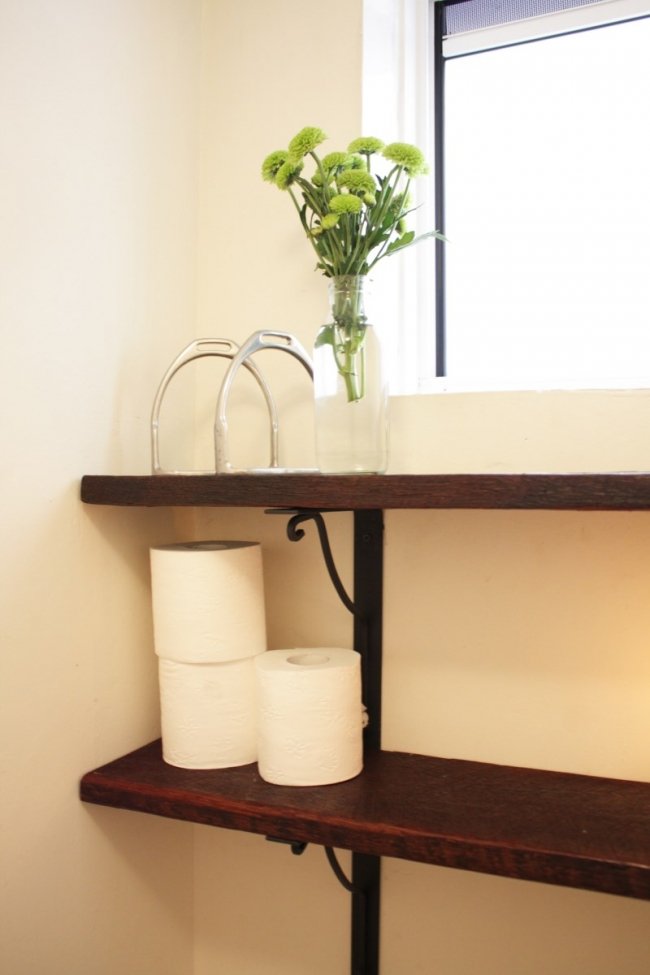
13. Place your finished shelves on top of the brackets.
14. Style! Admire your finished work and then wait expectantly for your husband to use the toilet and hear his shout of joy.
The laundry and the toilet still definitely aren't finished. I actually want to wallpaper a wall in the toilet with pages from an old Webster's dictionary or a vintage French dictionary much like the lovely and creative Kylie from Lucy Violet Vintage has done (Mr Nerd says no to the wallpapering so I am just waiting, patiently, for him to go on another work trip).
For now, the ugly 70s floor tiles in the toilet are still there, there’s still no built-in storage in the laundry itself, and there are angry wasps banging at the laundry window trying to get into the house. But right now my rustic timber shelves in our toilet look cute and that makes me happy and detracts my eye from the ugly floor.
What inexpensive change have you made to your house that makes you happy? What would you like to do in future? Do you have a lurvely 1970s laundry too? What is your pick at the icecream van? (sherbet-dipped cone, every time). Maya x


